
Most styling frustration comes down to fighting your skeletal proportions instead of working with them. Trends change rapidly—one season celebrates oversized tailoring, the next demands cropped silhouettes—yet the underlying geometry of personal style remains constant. Clothes look best when they create visual balance, direct the eye intentionally, and harmonize with your natural proportions.
Dressing well is not about fitting into sample sizes; it is an exercise in visual physics. By understanding where your body naturally creates angles, curves, and lines, you can use fabrics, necklines, hemlines, and tailoring to create a balanced, intentional silhouette every single day.
This comprehensive styling guide breaks down the structural rules, geometric formulas, and tailoring strategies for three of the most common body silhouettes: the Hourglass, the Triangle (Pear), and the Rectangle.
Part 1: The Geometry of Visual Balance
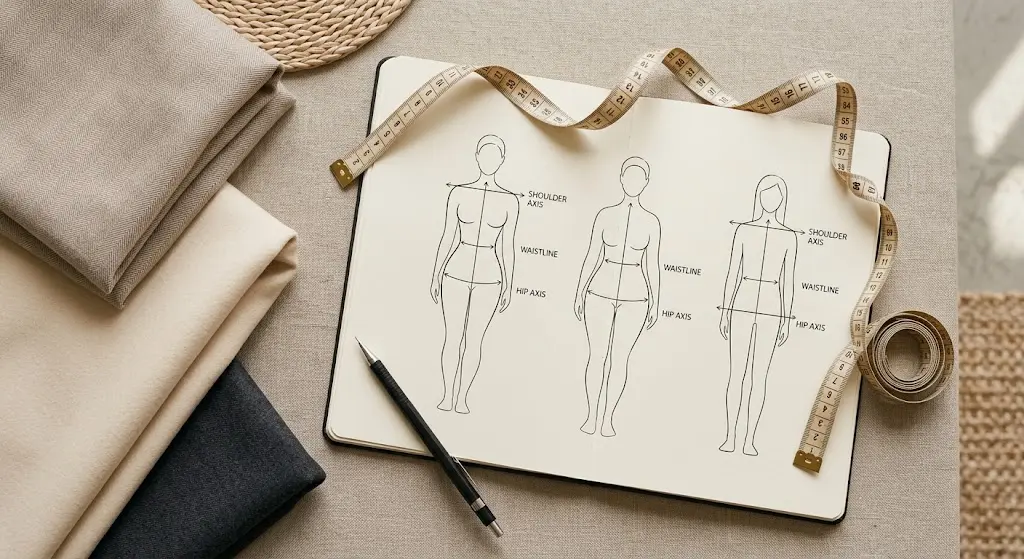
The human eye looks for symmetry and balance. In personal styling, that balance is governed by the relationship between three anatomical focal points:
[ 1. SHOULDER LINE ] ◄── Width across acromion bones
│
▼
[ 2. WAIST POINT ] ◄── Narrowest section of ribcage
│
▼
[ 3. HIP AXIS ] ◄── Widest point of trochanters/glutes
Every silhouette creates a geometric dialogue between these points:
- When shoulders and hips align with a sharply defined middle, the eye reads an X-frame (Hourglass).
- When hips sit wider than the clavicle and shoulder cap, the eye tracks downward along an A-frame (Pear).
- When shoulders, waist, and hips share an identical linear plane, the eye scans a clean H-frame (Rectangle).
Flattering styling is not about forcing every figure into an hourglass. It is about counterbalance. If a silhouette feels bottom-heavy, we add structure to the top line. If a figure is linear and straight, we use diagonal cuts and belts to break up vertical planes. If curves are prominent, we prevent excess fabric from hiding natural waist definition.
Part 2: Accurately Measuring Your Proportions
Before investing in new clothes, calculate your structural proportions with a flexible measuring tape. Avoid estimating based on clothing tags; modern vanity sizing varies dramatically across brands.
┌─────────────────────────────────────────────────────────────┐
│ 1. SHOULDERS │
│ Measure around the outermost edge of your shoulder caps. │
├─────────────────────────────────────────────────────────────┤
│ 2. BUST │
│ Measure across the fullest point of the bust line. │
├─────────────────────────────────────────────────────────────┤
│ 3. NATURAL WAIST │
│ Measure the narrowest point, usually 1–2 inches above navel.│
├─────────────────────────────────────────────────────────────┤
│ 4. HIGH & LOW HIPS │
│ Measure around the widest protrusion of hips and buttocks. │
└─────────────────────────────────────────────────────────────┘
Mathematical Profile Definitions:
- The Hourglass Silhouette: Your waist measurement is at least 25% smaller than both your shoulder/bust measurement and your hip circumference. Shoulders and hips are within 5% of each other in total width.
- The Pear (Triangle) Silhouette: Your hip circumference is more than 5% larger than your shoulder or bust measurements. Your waist is clearly defined and sits narrower than your hips.
- The Rectangle (Column) Silhouette: Your shoulder, bust, and hip measurements fall within 5% of one another, and your waist circumference is less than 25% smaller than your bust or shoulders.
Part 3: Mastering the Hourglass Silhouette (The X-Frame)
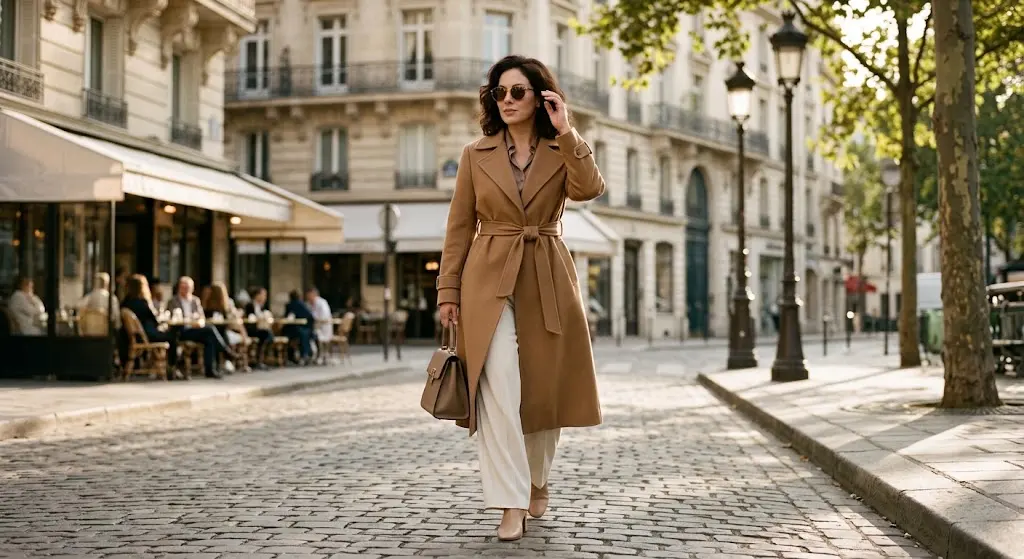
ANATOMY OF THE HOURGLASS
════════════════════════
\ Bust / Balanced top
\ /
)Waist( Narrow, defined center
/ \
/ Hips \ Balanced base
The hourglass frame is defined by natural symmetry: the shoulder girdle and hip axis share similar dimensions, accented by a narrow waist. The most common styling error is treating the hourglass as a blank canvas that looks good in anything.
Because the bust and hips already project outward, loose, unstructured fabric hangs from the widest points, hiding the narrow waist beneath tent-like drapes.
Primary Styling Rule: Preserve Waist Definition Without Adding Unnecessary Bulk
- Avoid: Boxy shift dresses, drop-waist silhouettes, stiff double-breasted blazers that lack contouring, and thick, chunky turtlenecks.
- Embrace: Form-skimming cuts, tailored single-breasted jackets, high-rise trousers, and soft fabrics that drape cleanly over curves.
Garment Recommendations for the Hourglass Frame
| Category | Highly Flattering Selections | Pieces to Avoid |
| Tops & Blouses | Wrap blouses, fitted ribbed knitwear, sweetheart and scoop necklines | High-neck babydoll tops, boxy cropped tees, oversized tunic sweaters |
| Trousers | High-rise wide-leg pants, clean tailored bootcut trousers, paperbag trousers | Low-rise skinny jeans, pleated front chinos, patch-pocket cargo pants |
| Skirts | High-waist pencil skirts, bias-cut satin midis, wrap skirts | Stiff pleated tennis skirts, drop-waist puff silhouettes |
| Dresses | True wrap dresses, fitted sheath dresses, ribbed knit midi dresses | Shift dresses, oversized tent maxis, sack frocks |
| Jackets & Outerwear | Belted trench coats, tailored single-button blazers, cropped moto jackets | Unstructured cocoon coats, boxy chore jackets |
Detailed Styling Strategies for the Hourglass
1. Necklines That Direct the Eye
High, closed collars form an unbroken horizontal block of fabric across the chest, making the bust appear heavier and shortening the neck line.
Prioritize open necklines:
- V-Necks and Sweetheart Cuts: Elongate the chest, reveal the collarbones, and frame the face.
- Scoop and Square Necks: Offer structural support while maintaining a vertical balance between bust and waist.
2. Trouser Construction: Combating the “Waist Gap”
Hourglass figures often struggle with jeans that fit the hips and thighs while gapping at the back waistband.
- Look for trousers designed with a high rise (11+ inches) featuring a contoured waistband.
- Choose denim that blends structured ring-spun cotton with 1% to 2% elastane for shape retention.
- Avoid front pleats that bow outward over the hips; opt instead for flat-front trousers with slant pockets.
3. Outerwear: Belting and Waist Seams
When selecting coats, look for built-in tailoring.
- Cocoon coats and straight oversized parkas swallow the natural waist, turning balanced curves into a heavy rectangular block.
- Choose belted wrap coats, tailored single-breasted trenches, and jackets cut with vertical princess seams that nip inward at the ribs.
UNSTRUCTURED COAT TAILORED / BELTED COAT
┌───────────────┐ ┌───────────────┐
│ │ │ │ │ \ / │
│ │ │ │ │ \ / │
│ │ │ │ │=====[BELT]====│ ◄── Restores waistline
│ │ │ │ │ / \ │
│ │ │ │ │ / \ │
└───────────────┘ └───────────────┘
(Hides natural curves, (Maintains natural X-frame,
creates boxy appearance) elongates leg lines)
Part 4: Mastering the Pear Silhouette (The A-Frame / Triangle)
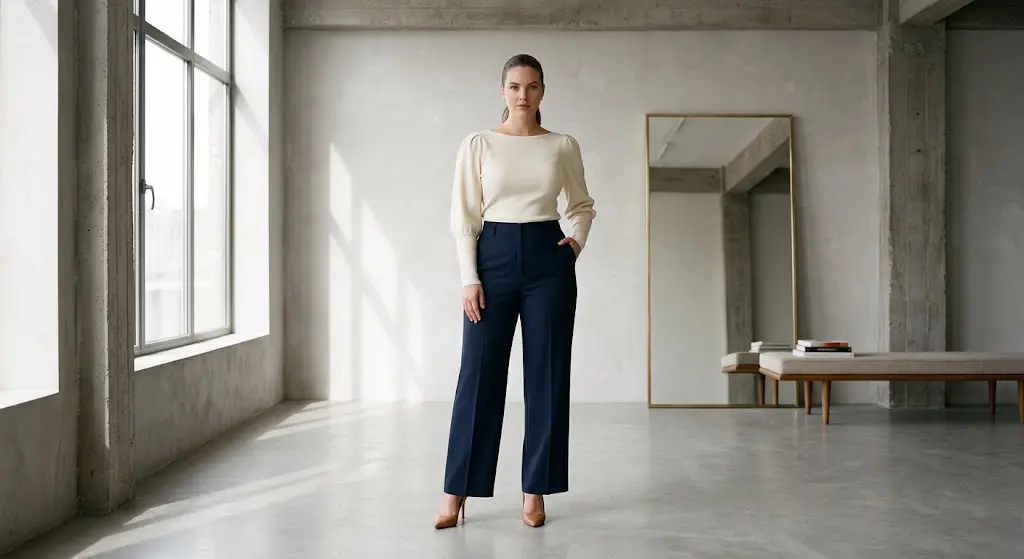
ANATOMY OF THE PEAR
═══════════════════
[Top] Narrow shoulders / smaller bust
/ \
( Waist ) Slender, elongated ribcage
/ \
/ Hips \ Wider hip shelf & thigh contour
The Pear figure features a slender upper torso, a defined waist, and hips and thighs that are broader than the shoulders.
The styling objective here is simple: widen the shoulder plane to counterbalance the hip axis, drawing the eye upward while showcasing a slender torso.
Primary Styling Rule: Build Volume on Top, Maintain Clean Lines on the Bottom
- Avoid: Low-rise bottoms, cargo pants with side pockets, tapered-hem joggers, and pencil skirts in heavy, clingy fabrics.
- Embrace: Structured shoulders, boatneck collars, statement sleeves, A-line skirts, and full-length trousers that drape cleanly from the hip.
Garment Recommendations for the Pear Frame
| Category | Highly Flattering Selections | Pieces to Avoid |
| Tops & Blouses | Boatneck tops, puff-sleeve blouses, horizontal striped tees, cowl necklines | Halter necks that narrow the shoulder, long clingy tunics |
| Trousers | Full-length wide-leg trousers, clean high-rise straight jeans, dark bootcuts | Light-wash skinny jeans, cargo pants with hip pockets, pleated chinos |
| Skirts | Fluid A-line midi skirts, bias-cut slip skirts, paneled skirts | Heavy clingy pencil skirts, tiered ruffled skirts |
| Dresses | Fit-and-flare dresses, structured shoulder wrap dresses | Low-waisted dresses, tight bodycon dresses, bias slips cut on the grain |
| Jackets & Outerwear | Tailored blazers with shoulder pads, cropped jackets ending above the hip | Long jackets ending right at the widest point of the hip, cocoon coats |
Detailed Styling Strategies for the Pear
1. Broadening the Upper Line with Smart Necklines
To balance wider hips, add visual width across the shoulders:
- Bateau (Boatneck) and Off-the-Shoulder Cuts: Draw a clean horizontal line across the clavicle, making shoulders appear wider and creating an hourglass effect against the hips.
- Shoulder Pads and Sleeve Details: Epaulets, puff shoulders, and cap sleeves build light structure on a narrow upper frame.
NARROW COLLAR (Halter) BOATNECK + STRUCTURED SLEEVE
/\ ┌─────────────────┐ ◄── Widens shoulder
/ \ │ │ plane
( ) │ (Waist) │
/ \ / \
/ [Hips] \ / [Hips] \
(Hips look heavier) (Upper frame balances lower half)
2. Bottom Halves: Selecting the Right Drape
When choosing trousers, avoid extremes:
- Skinny jeans create an inverted triangle shape that emphasizes the width difference between ankles and hips.
- Wide-leg and bootcut trousers drop in a straight, elegant line from the widest part of the hip down to the shoe sole, balancing proportions and visually lengthening the legs.
- Look for fluid mid-weight fabrics like wool twill, heavy viscose, and matte crepes that fall cleanly without clinging.
3. Outerwear Length: The “Mid-Hip Hazard”
Jackets that end directly at the widest point of the hips draw a clear horizontal line across that zone, making hips look wider.
- Choose cropped jackets that finish neatly at the natural waist to highlight your slender torso.
- Alternatively, opt for duster or three-quarter length coats that fall below the knee, creating a long, uninterrupted vertical line.
Part 5: Mastering the Rectangle Silhouette (The H-Frame / Column)
ANATOMY OF THE RECTANGLE
════════════════════════
[ Shoulders ] Athletic, straight shoulder frame
│ │
│ Waist │ Minimal indentation at waistline
│ │
[ Hips ] Hips match shoulder line
The Rectangle silhouette features an athletic, balanced build where shoulders, waist, and hips share similar measurements.
Rather than needing to counterbalance wider sections, styling for the rectangle focuses on adding visual curves, breaking up long vertical planes, and creating waist definition.
Primary Styling Rule: Create Dimensions with Diagonals, Volume, and Asymmetry
- Avoid: Shapeless shift dresses, head-to-toe tight tube cuts, and stiff shapeless silhouettes.
- Embrace: Asymmetric hemlines, peplum details, bold belting, pleated trousers, and layered separates.
Garment Recommendations for the Rectangle Frame
| Category | Highly Flattering Selections | Pieces to Avoid |
| Tops & Blouses | Peplum tops, wrap blouses, deep V-necks, tops with ruffled or cowl details | Boxy straight-cut t-shirts, square-neck stiff shirts |
| Trousers | Pleated high-waist trousers, paperbag waist pants, cargo pants, flared jeans | Ultra-low rise jeans, limp unstructured leggings |
| Skirts | Pleated midi skirts, tiered skirts, A-line silhouettes, tulip skirts | Straight unbelted column skirts |
| Dresses | Trench dresses with belts, fit-and-flare dresses, cutout waist dresses | Straight shift dresses, unbelted shapeless sweater dresses |
| Jackets & Outerwear | Tailored blazers with defined waists, cropped biker jackets, belted trenches | Straight boxy chore coats, unconstructed duster cardigans |
Detailed Styling Strategies for the Rectangle
1. Creating the Optical Illusion of Curves
Since the ribcage and pelvis sit in a straight line, use clothing lines to create an hourglass illusion:
- Peplum and Flared Hem Tops: Flare out gently past the hips, making the waist appear narrower by comparison.
- Asymmetric and Wrap Cuts: Break up the torso diagonally, disrupting straight vertical lines.
STRAIGHT COLUMN TOP PEPLUM / BELTED WRAP TOP
┌───────────────┐ ┌───────────────┐
│ │ │ │ │ \ / │
│ │ │ │ │ \ / │
│ │ │ │ │=====[BELT]====│ ◄── Creates waist illusion
│ │ │ │ │ / \ │
│ │ │ │ │ / Flared \ │ ◄── Builds hip dimension
└───────────────┘ └───────────────┘
(Emphasizes straight lines) (Builds curvature through geometry)
2. Taking Advantage of Pleats, Pockets, and Volume
Unlike hourglass or pear shapes who often avoid hip volume, rectangles can comfortably wear intricate details:
- Pleated Front Trousers: Add dimension and texture over the hips and thighs.
- Cargo and Utility Details: Side pockets and hardware create shape and add visual interest.
- Paperbag Waistbands: Gather fabric above a belt, creating high-contrast texture right at the waistline.
3. Styling Monochromatic Column Outfits
When wearing a single color head-to-toe, a rectangle can look like a uniform column.
- Add an open blazer in a contrasting shade to frame the torso with two vertical lines.
- Or, add a statement leather belt over an unbuttoned knit to anchor the center of the outfit.
Part 6: The Universal Principles of Proportion
Regardless of your body shape, four universal styling concepts govern how outfits come together:
┌─────────────────────────────────────────────────────────────┐
│ 1. THE RULE OF THIRDS (Golden Ratio 1:2) │
│ Divide your outfit into 1/3 top and 2/3 bottom. │
├─────────────────────────────────────────────────────────────┤
│ 2. FABRIC WEIGHT DIALOGUE │
│ Pair structured fabrics with fluid, drapeable pieces. │
├─────────────────────────────────────────────────────────────┤
│ 3. INTENTIONAL HEMLINE PLACEMENT │
│ End hems at the narrowest parts of limbs (ankles, wrists). │
├─────────────────────────────────────────────────────────────┤
│ 4. BALANCED FIT ARCHITECTURE │
│ Pair fitted tops with voluminous bottoms, or vice versa. │
└─────────────────────────────────────────────────────────────┘
1. The Rule of Thirds vs. The 50/50 Pitfall
Dividing an outfit cleanly in half—such as pairing an untucked tunic with mid-rise pants—cuts your visual height in two equal pieces, making legs appear shorter and the torso elongated.
Apply the Golden Ratio (1:2):
- Wear a cropped jacket or tucked blouse representing one-third of your total height.
- Pair with high-waisted trousers or a midi skirt representing the remaining two-thirds.
- This proportion instantly lengthens the leg line and creates a taller, more balanced frame.
THE 50/50 CUT (Unflattering) THE 1:3 TO 2:3 RATIO (Flattering)
┌──────────────────────────┐ ┌──────────────────────────┐
│ │ 50% │ Top / Tucked Blouse │ 33% (1/3)
│ Untucked Top │ ├══════════════════════════┤
├──────────────────────────┤ │ │
│ │ │ │
│ Bottoms │ 50% │ High-Waist Bottoms │ 66% (2/3)
│ │ │ │
└──────────────────────────┘ └──────────────────────────┘
2. Matching Fabric Weight to Your Silhouette
A garment’s structure depends entirely on its fabric:
- Crisp, Dense Fabrics (Raw denim, wool twill, structured poplin): Hold their own form, creating clean architectural angles. Perfect for building shoulder lines on pears or hip shape on rectangles.
- Fluid, Drapey Fabrics (Silk, satin, viscose, light tencel): Follow body curves without adding bulk. Ideal for hourglass frames and fluid A-line skirts.
3. Hemline Placement on Limbs
A horizontal line always attracts the eye. Ensure your hemlines finish at flattering points:
- Skirts: Aim for just below the knee, just under the calf muscle, or down at the ankle bone. Avoid cuts that stop directly across the widest point of the calf.
- Sleeves: Three-quarter sleeves ending at the wrist line highlight the narrow waist area, while blunt cap sleeves emphasize shoulder width.
Part 7: Quick Reference Cheat Sheet
Keep this visual guide in mind when evaluating outfits in the mirror:
┌────────────────────────────────────────────────────────────────────────┐
│ SILHOUETTE AT-A-GLANCE GUIDE │
├───────────────┬──────────────────────────┬─────────────────────────────┤
│ BODY SHAPE │ CORE OBJECTIVE │ HERO GARMENTS │
├───────────────┼──────────────────────────┼─────────────────────────────┤
│ HOURGLASS │ Celebrate waist; avoid │ Wrap tops, high-rise pants, │
│ │ stiff boxy silhouettes │ belted coats, scoop necks │
├───────────────┼──────────────────────────┼─────────────────────────────┤
│ PEAR │ Broaden shoulder plane; │ Boatneck tops, puff sleeves,│
│ │ streamline hip drape │ A-line skirts, wide-leg pant│
├───────────────┼──────────────────────────┼─────────────────────────────┤
│ RECTANGLE │ Break straight planes; │ Peplum cuts, pleated pants, │
│ │ build curve illusions │ paperbag skirts, wide belts │
└───────────────┴──────────────────────────┴─────────────────────────────┘
Part 8: Frequently Asked Questions
Can your body shape change with weight changes or age?
Yes. Skeletal width across your shoulders and hips remains largely fixed, but hormone shifts, weight changes, and postpartum recovery can redistribute body fat. An hourglass may carry weight in the lower half and lean toward a pear, while a rectangle might soften into an hourglass. Focus on your current measurements rather than past shapes.
Which dress silhouette flatters every body shape?
The true wrap dress is universally flattering:
- On the Hourglass, the tie belt cinches the natural waist and frames curves without pulling.
- On the Pear, the V-neck draws attention upward while the skirt flares gently over the hips.
- On the Rectangle, the diagonal overlap and tied belt create the visual illusion of a contoured waist.
THE UNIVERSAL WRAP DRESS
┌──────────────────────┐
│ \ / │ ◄── V-neck elongates neck & chest
│ \ / │
│======(TIE BELT)======│ ◄── Cinches waist at narrowest point
│ / \ │
│ / \ │ ◄── A-line skirt glides over hips
└──────────────────────┘
What if my shoulders are pear-shaped, but my bust is large?
This is often called an “Hourglass-Pear hybrid.” Style for your bust first using open necklines and fluid wrap tops, then follow pear-friendly rules below the waist with clean, wide-leg or straight trousers.
Building Personal Style with Confidence
Understanding proportions is not about hiding your body behind rigid rules. It is about learning the mechanics of clothing so your wardrobe works for you, rather than against you.
Invest in quality basics that match your natural bone structure, take time to visit a tailor for adjustments, and use these visual formulas to get dressed with ease and confidence every day.